Sunday, November 24, 2013

DWR Quilt - otherwise titled as "Never Again"

So let's get right to the pictures, shall we?

DSC_0092

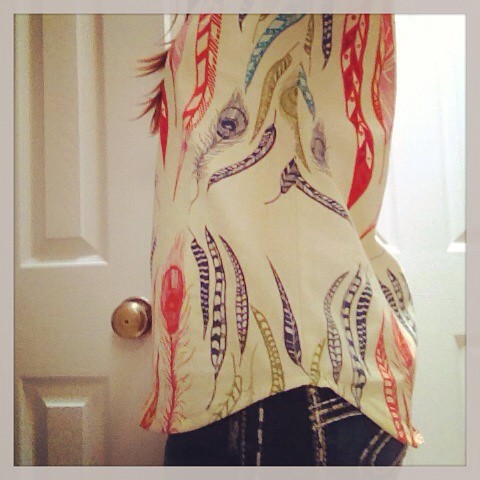
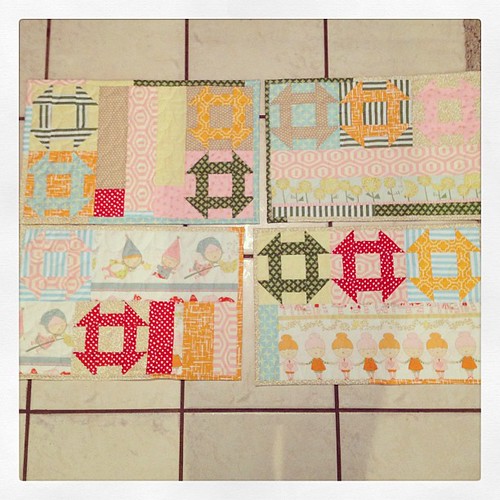
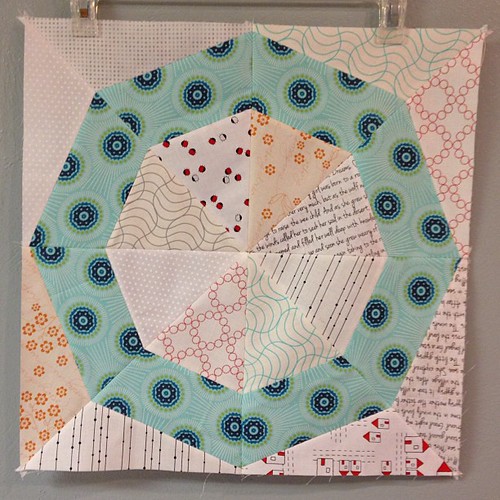
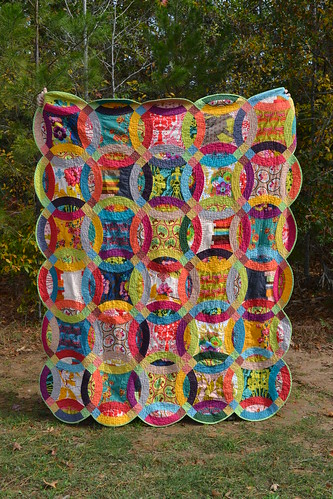
I guess I should start with what started this crazy idea in my head - it was after seeing this blog post by Faith on her blog Fresh Lemons Quilts.   If you follow the link it will take you to the exact post with the DWR table runner she started.   I saw that and automatically my mind went to the latest AMH collection that I'd purchased, Hand Drawn Garden.   I thought those big melons would be a great way to showcase those amazing prints in the line.   I'd also purchased a coordinating solids bundle from Westwood Acres.  So I thought about it for a few days, how would I do the arcs, what fabric would I use for the squares, etc.   I also didn't have the templates, so I entered the giveaways still open in the EZ Quilting DWR Challenge blog hop.   I had actually priced the templates online, decided Amazon was probably the best place to get them when I got an email saying I'd won a set of templates!   So, of course, I had to do it!   The only thing left was to determine which fabrics I would use for the 4 square centers.

Ok, which 2 hugs and kisses print?  Or should I go crazy and use all if them?
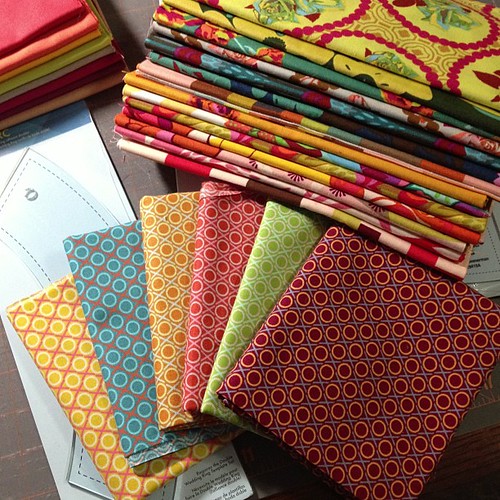
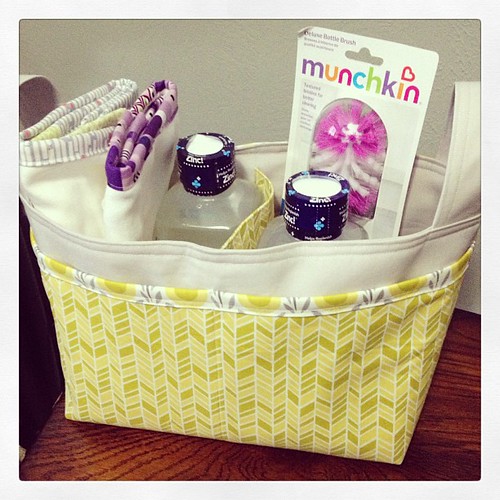
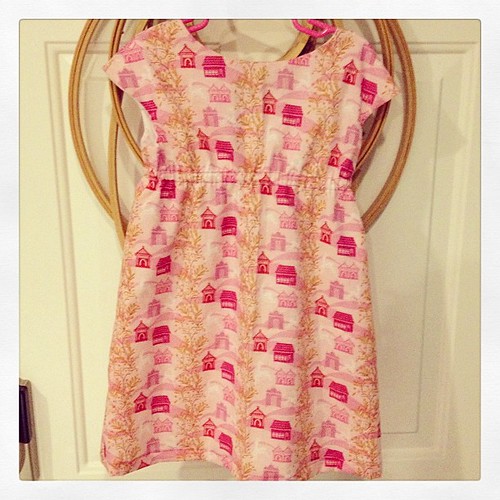
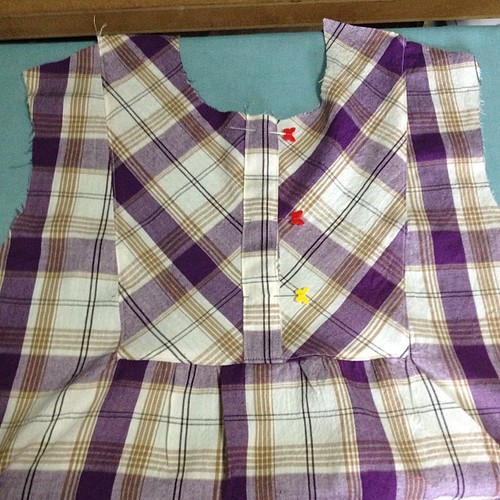
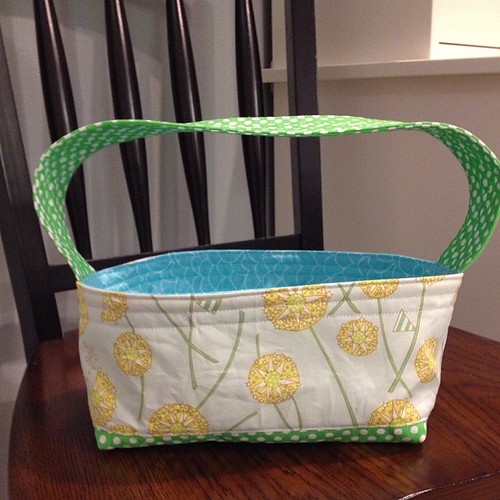
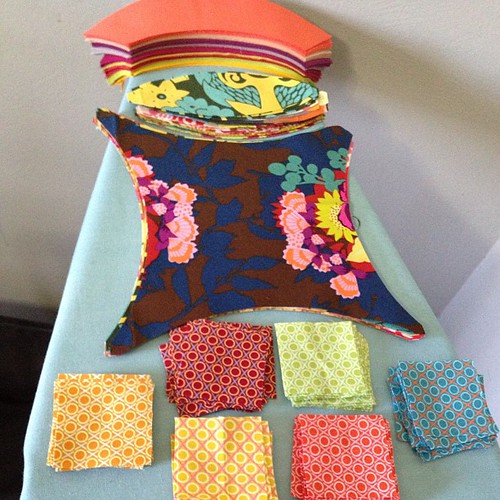
Auditioning fabric for squares!

After a few fabric auditions, I decided on using all of the hugs and kisses prints from AMH's loulouthi line.   All of her fabrics play so well together!   I didn't have any concerns about them not looking great together!

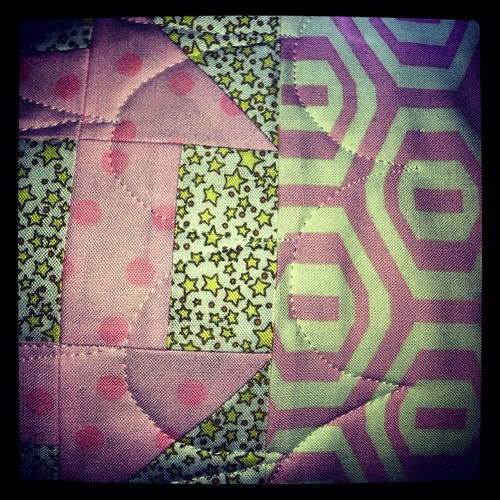
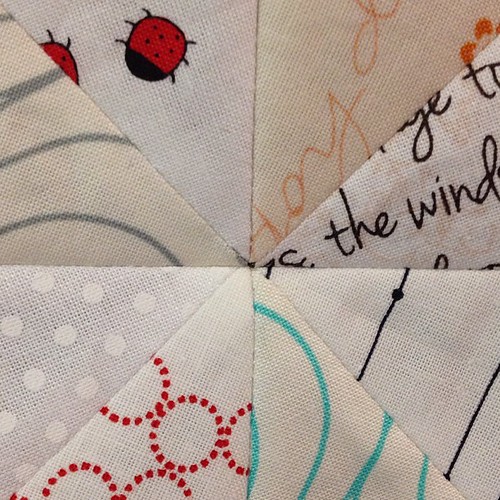
Once I got started I ran into a few hurdles.   I didn't have enough variation in the solids.   So I consulted my stash.   Lacking.   So I consulted the post "What goes with What?" on Pink Chalk Fabrics here.   I was able to flesh out my blues, greens, oranges, purples, and yellows.   It's hard to see in some of the pictures, but I used several different shades of the same colors.   There are at least 3-4 different shades of red/pink-red alone.   The purples and blues?   Lots of those too.
DSC_0098
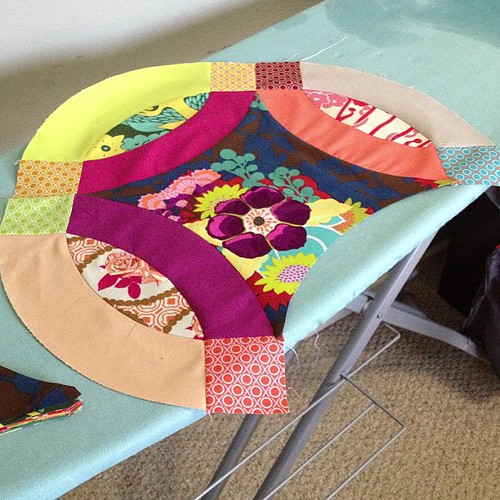
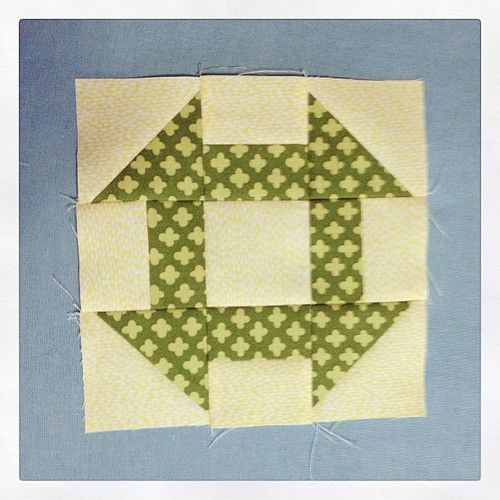
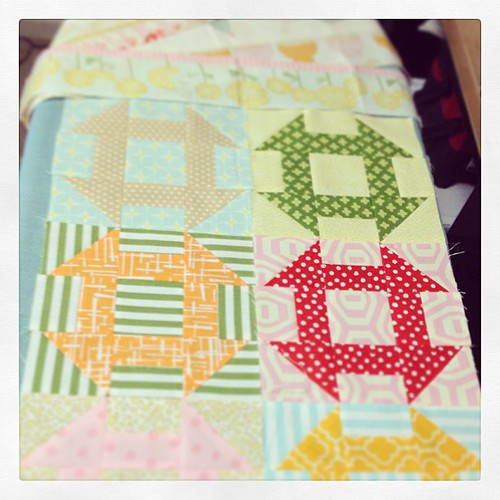
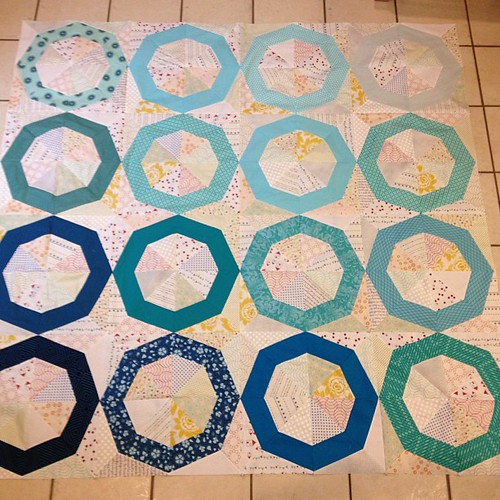
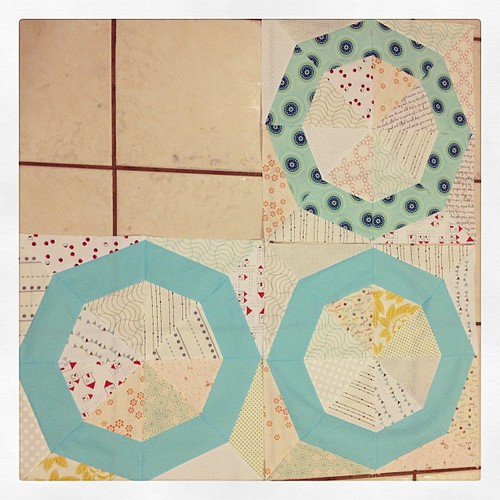
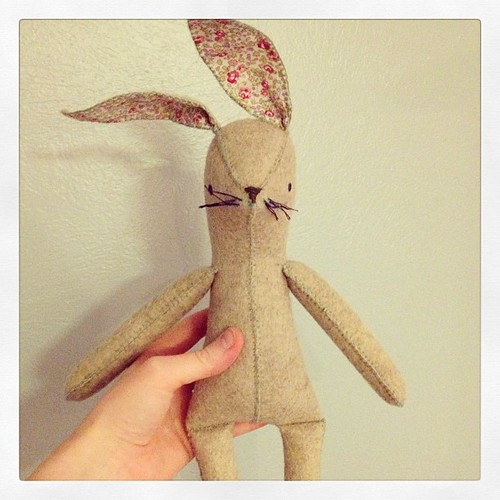
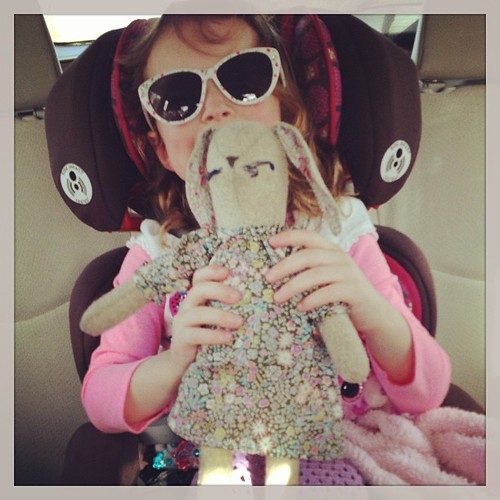
You can see some of the different tones of the same colors I used!
I've done so much cutting I developed a blister and had to take a day off... I also had to work, but that's not near as exciting.

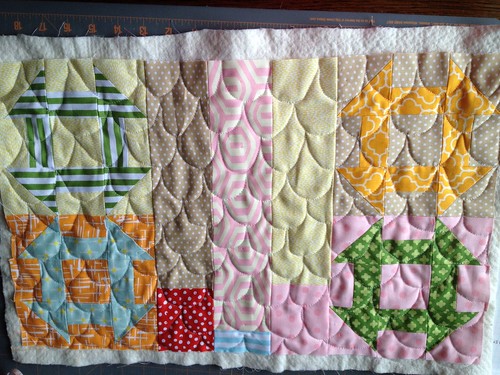
The templates made it so easy to cut the fabric!   It wasn't exactly fun, but that was because there were so many pieces.   

Almost finished piecing this guy - hopefully by this week!  #dwrquilt #annamariahorner #handdrawngarden

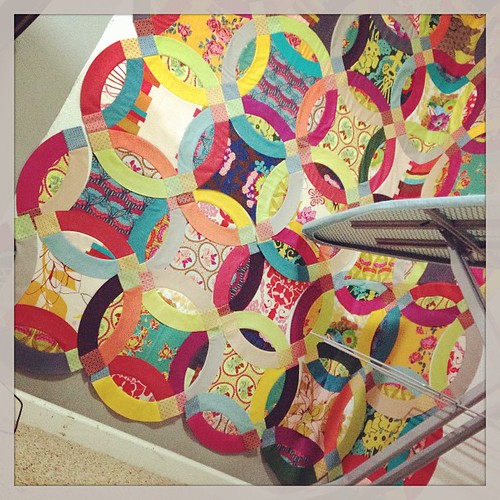
A design wall was definitely a "must-have" for this project.   There's no way I would have been able to accomplish this without one.   I mean, carpet would have been okay, but with pets/kids there's no way it would have survived til morning!
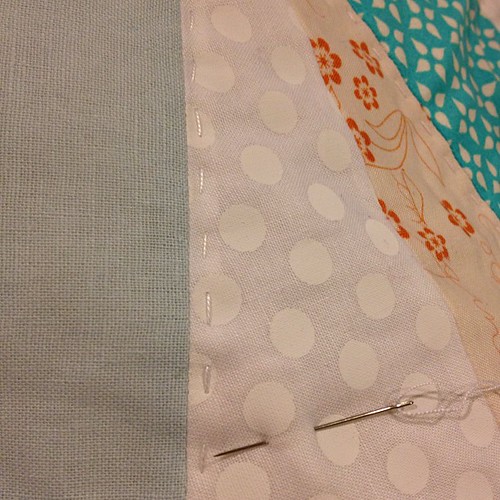
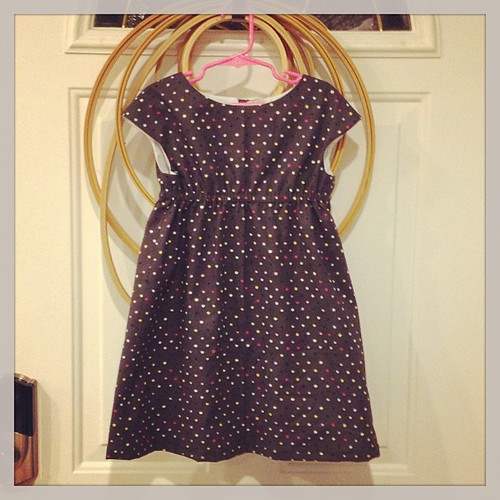
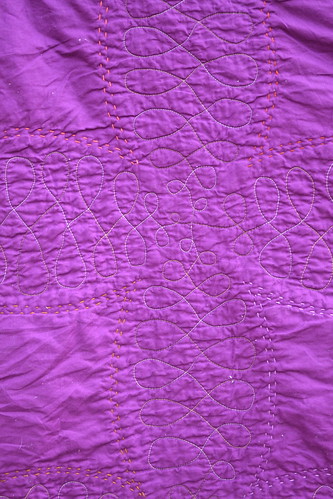
DSC_0108

Once I had the top assembled, I had to decide on quilting.   If you've been following me on instagram (here), you'll see that I had quite a bit of trouble.   I unpicked a LOT of quilting.   But as you can see from the pictures, I finally decided on something!   I'm really happy with what I settled on.


The never ending binding... #dwrquilt
Binding

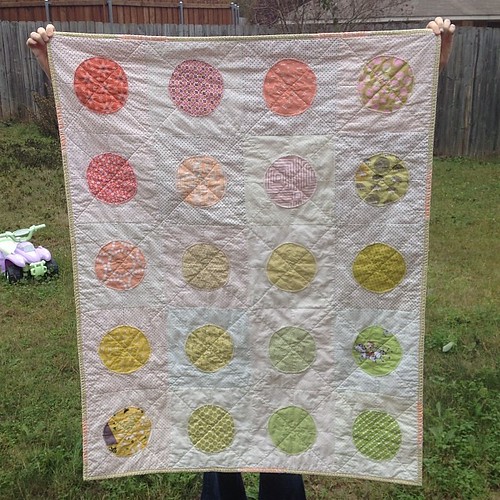
The binding I settled on is the green Hugs and Kisses print.   Attaching the binding was ... hard.   I consulted The Plaid Scottie's DWR QAL she hosted a few years ago (here).   That really helped me out quite a bit.   I think if I needed to bind another DWR quilt I would choose 2.5" binding instead of 2.25".   That extra wiggle room would have been really nice.

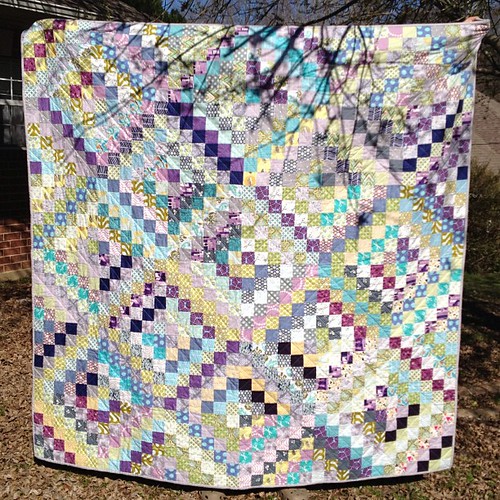
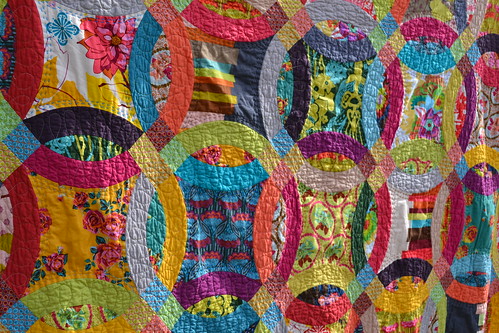
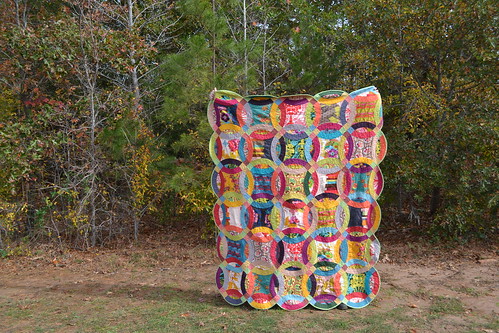
Now here's a couple more shots to end the post:

DSC_0086

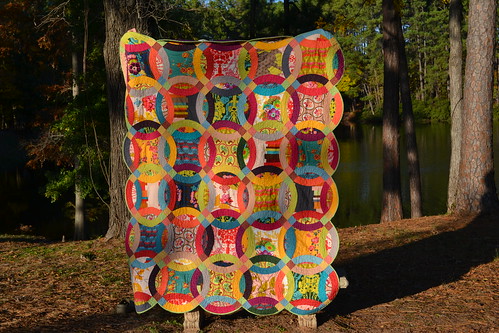
I'm entering this quilt in the Double Wedding Ring Quilt Challenge hosted by EZ Quilting & the NYC Mod Quilt Guild, along with a lot of other people that you can read about here.  

DSC_0094

Quilt Stats:
Size: Twin
Fabric: AMH Hand Drawn Garden, AMH Loulouthi Hugs & Kisses, various solids
Binding: AMH Loulouthi Hugs & Kisses
Quilting: Me (machine and hand)
Finished: 10/31/2013

A Xmas Pillow Swap

Here's the "stuffed" picture of my new pillows!

My new Christmas Pillows!

They were made for me by my sewing buddy Emily.   She said they were her first pillows ever!   She did such a good job making them.   The star one on the left might have a permanent spot on my couches.  :)


@esposetta seriously gives the BEST gifts!! I got a hand made cowl!  I love the color!  Claire had to try it on immediately, but I've taken it back and told her she's never to touch it again, lol!  And I'm going to go make the pillow forms right now!  Can

She seriously spoiled me with this swap.   I got those chocolate goodies, which Claire demanded to have one of right away, some Tula Pink scraps, Thangles (can't wait to try them out!), a sample of Soak, and a drawstring pouch that had the best gift of all - a hand-knit by her cowl!   I feel so incredibly spoiled.   Claire wanted to wear it, but I took it away and told her never to touch it again!   It's all mine.  :)   And isn't that bottom left face hilarious?   I told her to smile.   That's what I got.   Ha!

She should get her package on Monday - and I'll write a post detailing what I sent!  

Thea's Baby Quilt

Here's a washed and crinkly picture!  Also reposting this because the previous picture wasn't showing up on the #westwoodacresgiveaway #finishit2013 and @acraftyfox_amanda !! (Sorry if it did and it just wasn't showing for me!).

So I have this awesome friend named Johanna.   We've been friends since 8th grade.   I wasn't really interested in being friends at first... in fact, I kinda hated her.   Ya know, cause I was 12.   Anyways, the usual 12 year old drama played out and 1 month later we were the best of friends.   Ha!  

This baby quilt is for her newly arrived daughter, Thea.   Last Friday I finished the quilt (and jokingly said that it's okay if she arrives now!), and on Saturday she was born.   I made a trip to Dallas to visit and deliver the quilt.  Little Thea had to stay at the hospital for a few extra days, but today she's home!   We're all so delighted she's at home and healthy.

The quilt is from the book Liberty Love.   Or, the main idea is.   I skipped making the drunken path blocks and just appliqued the circles onto 4 patch squares.    I wish now that I hadn't have already cut out all of the squares before I changed my mind about the pattern, but I think it turned out all right!   I kept the quilting simple and sparse, so it would be nice and soft.   The binding was machined on for durability!   I'm sure this guy will get lots of washes!   The background polka dot fabric is Riley Blake's Le Creme line, and the circles are all from stash.   Some Lizzy House, Heather Ross, Amy Butler, an Art Gallery print with no selvage, Violet Craft, and Cloud 9's Organic line for Joann's.   The backing is the pink herringbone from Cloud 9's Organic line at Joann's.

Monday, September 9, 2013

Baby Showers & a New Project

My best friend is having a baby.   So this means lots of sewing on my part, right??

I decided on sewing up two fabric baskets for her using Noodlehead's Divided Basket Pattern.  Here they are:

Divided basket I made using an @noodlehead531 pattern and #cloud9fabrics

My friends 2nd baby shower gift.   She said she broke her phone, so hopefully I'm safe posting this early!

I included some goodies in both baskets.   Basic baby essentials.   Butt paste, Tylenol, Motrin, burp rags, bottle brush, and some wipes.   (Not all pictured.)

I edged the burp rags with leftover pieces of 2.5" strips I had laying around from my scrappytripalong quilt.   There were 10 in all.

I enjoyed the pattern.   It was pretty easy to assemble, and once you made the lining it goes together really quickly.   I also enjoyed using fusible fleece.   It was my first time, and I think I'm going to have to get some more to use again!

My friends were all a-wonder at how everything went together.  They asked things like "how did you do it?!?"   My reply was "magic".   Why?   Well, every time I try to get my friends to come over and sew, or for me to teach them how to sew, they shrug it off like they could never accomplish something like this.   I try to tell them that I follow patterns.   That I research tutorials on the internet.   That it's all about just doing it and getting it wrong a few times until you get it right.   It's frustrating.   But what can you do?   I can't make them.  It's my hobby, not theirs.

But they all just love my hand-made presents.   I'm thinking that next year for my birthday, we're going to have a dedicated sew-in day.   I'll teach them to sew.   I could even gather up a few extra machines so everyone has one.   :)

I currently have 2 quilt tops mid-assembly.  (Not counting the ones that are basted.)   I also have a few blog posts in order over completed projects... they're coming!   I need good pictures.
#1:  AMH voile St. Louis 16-patch
I am in love with this guy!   I just couldn't resist cutting into my AMH voiles after being inspired by @lilysquilts !

I have 14 blocks.   And I love it.   But I'm putting this on hold for my new completely awesome....

#2: AMH Hand-Drawn Garden Double Wedding Ring Quilt
My first "block"?   I'm going to have to plan then sew each block, so it's going to be time consuming!

Here's a picture of the first block.   Currently, I'm at the first two rows being completely finished.   I'm making it Twin sized, which will end up being 5x6 of those main "squares" you see.   The cutting is complete, but the piecing takes forever.   There's not a tutorial for the specific DWR templates that I'm using.   (EZ Quilting acrylic templates)   I've had to cobble together some information from other tutorials, quilt alongs, and youtube videos.   I think I've got it completely figured out so that I can get perfect points though.   This is quite refreshing, because I've got a lot of fabric awaiting assembly.   I hate to let it down.  

I mainly post updates on my instagram account, @elizthany if you want to keep up with me.   I had a complete "OMG!" moment on instagram the other day.   THE Anna Maria Horner "liked" my picture.   Yes.   I know.   She's just a person.   But I would totally freak out over meeting her!   I am totally kicking myself that I didn't attend QuiltCon and go to one of her sessions, especially when it was so very close.   Oh well.   Another day!

Hope you have a lovely week!

Tuesday, July 23, 2013

Wiksten Tank

Whew!   I'm giving my blog a workout today, huh?!?


Last one, I swear!

Well, I braved the whole "cutting into my AMH fabric".   I love it!   I made a size medium and took in the sides about an inch on both sides.   If I hadn't done that it would have been way too blousey for me.  I like shirts/tops to fit close to my body.

Here's the dress on me:


Finish #2 today: #wiksten tank using #annamariahorner #fieldstudy

And a side view, so you can really see how much I brought it in:


Untitled

This was super simple to make!   I can easily see myself making a whole army of these for my closet.  

Quilts and Mug Rugs tomorrow!

Sewing for Claire

My daughter likes me to sew for her.   Which is thankful, because somebody needs to want and appreciate all this stuff I'm making!   I've made her 3 items lately.

Item #1:

A second dress for my Claire :).  It seems like all she wants to wear are dresses lately, so hopefully this will get lots of use!

Another Roller-Skate Dress.   This was quick and easy, especially since I didn't have to refer to the directions all that much!   She likes it because it's soft.   She's also been in a "I only wear dresses" phase, so hopefully this one will get lots and lots of use!

(This dress still has no button, and it's been worn twice.   Oops.)

Item #2:

O.M.G. This block is so sweet and fun to make!!   First of many for Claire's placemats!

Some place mats using a novelty fabric I had purchased quite a while ago.   I wanted it to feature Churn Dash blocks (see above), and I wanted it to use some of the fabrics I had accumulated from the Stash Stack Club from Pink Castle Fabrics.


Claire's placemats are coming along nicely!   Hope to have them finished this week!  No work = sewing time!  :)

The blocks ended up being a lot of improv - making these scraps of fabric fit.   I didn't like it.   Give me a pattern any day and I'll be happy.   But hand me fabric and tell me to create, and I'll be stumped and annoyed.   They ended up turning out quite cute if I may say so myself.


Four placemats for my daughter?  Done!

They also used up some fabric.  :)  After doing these, I've decided that I love polka dots and stripes, and I need more of them in my life.

I used a new to me quilting pattern:

Untitled

The contrast is high on this one so you can see the detail.   It was super easy to do these, and I have plans for a quilt in the near future using this FMQ pattern.


Untitled

I find that even my mistakes are hard to see when you view it as a whole.   Some of the clamshells are obviously wonky, but frankly, if you see that I think you're looking too close!   All in all, I would definately recommend this pattern to anyone wishing to try something different from straight lines, but not too different, if you know what I mean.

Item #3:


Travel pillow completed for my daughter!   Those Velcro loops attach to the seat belt.

A travel pillow for our upcoming beach 9 hours away vacation.   I totally made this up on my own after googling "travel pillow for kids".   There were some similar items, but at the price of $30, I knew I had to make my own.   It's roughly 7"x26" and has 4 velcro straps on the back.


In action!

Claire loves it.   She slept with it the night I gave it to her, and it's currently hanging out wither some baby dolls on the living room floor while she naps.   :)

The best part is that I got to use that Kokka fabric you can see in the last picture.   My very first "on a whim" fabric purchase.   Two years later, it's found a purpose.   Joy.  I think it's absolute perfection in this project.   Claire also made very sure before she went to bed that if we lost this pillow, ya know, if it got lost in the woods or anything, that I could make her another one.   After I reassured her that it would rarely leave the car, and would never get lost, she nodded off to sleep.   Still making sure I had enough fabric to make another one.

TovaSewTogether

This post is a little late, considering I think I made this, what?   A few weeks ago?   Better late than never!

So after making my daughter the Roller Skate dress, I knew I needed to make myself something!  I'd bought some fabrics from Sew Mama Sew's $6 sale, and I had some AMH linen.   My sewing buddy Emily and I decided to encourage each other by setting a deadline and messaging each other through instagram.   We both decided on the Wiksten Tova.

Placket: complete!  #wiksten #tova @esposetta

I decided quite last minute that I was too scared to use my precious AMH linen on my first attempt at garment making, so I headed out to Hancock Fabric and pick up this Madras material.  It wasn't that hard to put together, and I really like the results.

I finished my #wiksten #tova !  It's all wrinkled cause I wore it to work :)

I decided to leave off the sleeves.   I thought they looked kinda funny, and I had seen sleeveless versions around the web and liked them more than the ones with sleeves!

I made a small and used a medium length since I like long shirts, and did no other alterations.   I've worn it a few times and noticed that the top is tight across my back and shoulders.   I think when I make this again I'll size up to a medium and perhaps take in the sides just a touch.   It's a cute shirt that I think will get plenty of use!

I've got a lot of things to blog about (I've been busy) so stay tuned!

Wednesday, May 29, 2013

Quilts needing to be Quilted...

I've been working on what I'm dubbing the "Spinning Ombre Stars" Quilt.   Here's an updated picture of the quilt top sewn together:

Quilt top complete!   Basting and quilting will commence tonight... Ready to get this DONE!!

I'm really impressed with how it looks.   It turned out exactly as I envisioned it!   Since this picture, I've basted the quilt, and hand-quilted about 80% of it.   I'm hand-quilting inside each ring and star.   If that makes sense.   I backed the quilt with a sketch flannel in dark blue that I had originally purchased for my #scrappytripalong quilt, but once I auditioned it with the quilt, it just didn't work.   I think I would have preferred a lighter blue, but the blue I had worked well enough.   This quilt isn't staying with me, so if it's not perfect, nobody will be the wiser.   I'm hoping to get some quality TV time in tonight to catch up on some shows I've been neglecting, so hopefully it will be all quilted up by the end of the weekend!   I'm going to try something new for the binding (maybe), a scrappy ombre binding, following the light to dark that the rings are making.   If that looks terri-bad, I'll just go for a normal binding.   Oooh, maybe a low-volume binding?   Always nice to have backup ideas.

The next quilt that is awaiting the needle and thread treatment is my Feather Bed Quilt.
This.   This is happening tonight. #ilovenightswithgrandparents #annamariahorner #featherbedquilt #fieldstudy

Here's a picture of it before I sewed up the top.   It's twin size, but unfortunately due to my inability to print out a pattern is a little short of the dimension in the pattern.   It's not too bad, and it will still fit on a twin bed quite nicely, I'm just a little irritated.   For the feather stems, I used Kona Marine.   It's a really pretty blue.   This is currently basted and backed in the pink woodcut fabric from AMH's Innocent Crush line.   I got that fabric at a steal from fabric.com for a measly $5/yd (or something really close to that price, it's been too long!).   I have no idea how to quilt this one.   I've been toying around with a few ideas.  
1) horizontal lines in between the feathers(1" or 3" apart?), outline the feathers and up the stem
2) horizontal lines across the whole quilt
3) outline feathers and up the stem

Options #1 & #2 would be a lot of work.   #3 would be easy.   But I'm keeping this quilt, so a lot of work doesn't phase me that much.   I'm leaning towards #1, but the sheer amount of work is kind of making me hesitate.

Lastly, on a slightly different note:  never buy the white on white fabric.   It's terrible to cut, machine and hand sew.   The bigger dots more than the little dots.   I hate the big dot Robert Kaufman white on white fabric.   Hate.   Here's a picture of what you shouldn't buy:
This white on white fabric is NOT fun to Hand quilt.   :( the "white" is like paint.   Eww.

Oh, and if you have to unpick your stitches, it totally shows.   Those white dots are paint!   Totally gross.

Here's to hoping it's not a month and a half before my next blog post!
Elizabeth

Wednesday, April 17, 2013

WIP Wednesday #1

So I'm going to start doing these!   I think it's going to be good to give myself some kind of "Hey you haven't finished this yet" kind of motivation.

So, without further ado, here's what I've got in progress:

#1: Spinning Stars Quilt


Mind if i squeal?  No?  Good. Because I LOVE this block!   #lowvolume #annamariahorner #spinningstars

The plan is to do an ombre effect, going from light to dark aqua/teals.   I'm using two low-volume bundles I purchased from Westwood Acres on Etsy, along with some scraps that I managed to pull out of my scrap bin.   I didn't have a lot of low-volume scraps, but I did have some of the aqua and grey on white swirl fabric you see above in the middle of this block - it's from the Washi Line by Rashida Coleman-Hale.   I purchased a half yard bundle of that on pure whim last year and it's really come in handy for zip bags, pouches, etc.   I'm sad to see the last of these fabrics go, but I'm also glad they're being used.   It's so satisfying to know that I used up some fabric.    It is similar to using the last little bit of toothpaste.

These blocks are cut from a template, all pretty much on the bias.   If you look at how the block is constructed, you have to sew these two triangle pieces together.   Since my machine's favorite late night snack is little bits of fabric, I start sewing the triangle pieces together in the middle and sew out on both sides.   It takes a little longer, but if you look closely you can see that everything is really lining up quite nicely, despite all the sewing being on bias.   Here you can see how well the first block went:
Also - omg, look at that point - it's perfect!!

Pretty impressive, if I say so myself.   I managed to get 3 blocks done, and the rest should come together quite quickly with most of the cutting already done.   Here are the 3 blocks together:
3/16 complete & (almost) all the "white" fabrics cut!  #spinningstars #annamariahorner

(Not Shown, for very boring reasons) Fabric Cut:
3/4 of A pieces
24/128 of B pieces
All of the C pieces

#2: Feather Bed Quilt

All blocks completed, just languishing in a nice neat pile.   I have the backing all picked out for this, and I already know how I'm going to quilt it.   The assembly of this quilt is open-ended, so when I got to that step I admittedly faltered.   I didn't want to just copy her pattern - I wanted to make it a little different.   I also didn't like how the pattern wasn't clear on what size cuts of fabric to make to "fill in" the spots between the feathers.   I don't have a design wall, so I'm going to need a dedicated day to decide how to do the layout and sew it all up.

#3: Roller Skate Dress

I have the lining cut and the fabric pre-washed.   It should theoretically take me about 2 hours to finish this.  In reality, it will probably take me 2 weeks.   I think Claire will really like this, and since she's a little short in the shorts department (ha!), she could really use the dress to beef up her wardrobe until I either go buy shorts or ask my sister-in-law for the hand-me-downs.

#4: Dessert of the Month, Winter Sampler & Woodland Sampler (in-progress)

February - minus the sparkle thread, which I haven't purchased yet.  #woodlandsampler #frostedpumpkinstitchery
No progress on the winter, and April is coming along nicely.   But let's not forget how I skipped over March.   I really like their Spring Sampler,  but I hesitate to buy it when I already have so many projects half-done.

#5: Grandmother's "zip-pouch/purse" thing (not started)

My grandmother wants me to make a "zip-pouch/purse" thing.   But it needs to be smaller than the one I showed her, with a handle.  *sigh*   Nothing is ever easy for her.   But I'll get around to it ... I basically don't want to have to make something up.   So that means I'll be browsing the interwebs for some awesome tutorial that will be the correct size.   Boo.

#6: 3/4" Hexagon Pillow

Obviously a long term project.   I maybe have a 5"x6" portion of the 20" pillow done.

Linking to Lee at Freshly Pieced.

Monday, April 8, 2013

Lately

I've been busy!   I've made lots of new things, but no quilts.   I have a sketch for my next one though. We will see if it actually comes to life...

First, an Easter basket.
A little Easter present!
No pattern, no real plan.  I knew how the construction was, so in my crazy head I though it'd all be ok!   In reality, it's floppy, too wide, and the walls of the basket part are too short.   Oh well.   It's cute!   Hopefully it'll prove useful carrying babies around or something...

Second, a Miss Maggie bunny from Posy Gets Cozy.

Miss Maggie is finished!  Now I have to start on her clothes so she's not naked tomorrow morning...

Here is the finished bunny.   I wrapped up bunny construction on Saturday night.   Then I whipped up the dress a little quicker than I would have liked to.   Here's a picture of Claire and Miss Maggie:

Take a picture of miss Maggie mama!
"Take a picture of Miss Maggie Momma!"
All the work was worth it because in the morning Claire got this really excited grin, grabbed the doll and whispered to her really quietly "We're going to be best friends.   You can sleep with me."   Melted my heart!

I have yet to complete the boots and the cape.   I haven't finished the boots because I've been busy with other stuff, and I haven't finished the cape because it looks terri-bad.   No, really.   I'm really glad it's a gift for a 3 year old.  

Third, I made Claire a dress!
I made Claire a dress!   Im quite proud of myself.  :)
Here it is!  

I used the Roller Skate Pattern from Oliver + S.   The fabric is from the Habitat Line by Jay McCarroll.   I got it $6/yd a few months ago.   There's enough fabric left Mommy might need a matching shirt!   Claire also really loved this.   She wore it all day long, and the next day, and made sure I was washing it so she could wear it again.   I made the size 5.   It was a really good fit.   A little big in the arm holes, but not exposing.   I have another all ready to go - a pink AMH voile this time!   The only thing I'm not fond of is the lining color.   I didn't think about it (next time I will), but I wish it were a color not so obvious.   Or I could have picked a really cute color, hot pink, light blue, etc.   It was easy to construct and I'm planning on finishing up #2 this week!

Next time I'll talk about my private swap with my sewing buddy and everything else I've been up to!

Elizabeth

#scrappytripalong

I just couldn't resist.   It looked so quick and easy.   And it was.   It really, really was.

#scrappytripalong done!  And thank goodness for tall husbands with really long arms!
Here is a picture of the quilt with my lovely husband (aka quilt holder).

I used all fabrics from my stash.   Once I had pulled a bunch of them out - I created a few rules:
1. No reds, blacks, or browns.
2. Stick to cool colors.

I think i was pretty successful in this.   There's one particular Lizzy House print that reads more "red" than the purple it is, but other than that I think all the colors are working well together.  As I look at the picture, I also see that the quilter's linen in dark purple looks black.   I also wish it had been left out, but I was trying to give the quilt a lot of different values.   I think it would have looked better if I'd stuck to all light/medium value fabrics.

I backed the fabric in grey sheet that came from a sheet set I had bought for backing a queen size bed quilt.   I'm glad to have used it!   The binding is a light grey herringbone, Riley Blake, I believe?

This quilt is headed to my sister-in-law's family.   They have been very generous with baby items.   Clothes, toys, essentials.   Just my way of paying them back!   Plus, we don't need any more quilts.  :)

Thursday, February 28, 2013

My first post! And a weekender bag.

My blog is doomed to failure.   Why?   Because nothing can live up to the awesomeness of this completed weekender bag in my first post.   (Minus the lining, of course.  But that's a small detail that I plan on finishing up this weekend!)  My next post will be terribly boring and won't live up to the standards that this bag has set.

My #weekender is complete!   (Minus the lining...) *whew*. My arms ache from wrestling that through my machine.
It's pretty awesome, right?   I was inspired by all the patchwork bags I saw popping up in instagram right before they all left for Sewing Summit.   I was particularly inspired by Lucy and Norman.   She made such a lovely bag.   But when I succumbed to the Black Friday purchase of the Cherry Limeade bundle from Pink Castle Fabrics, I knew just what to do with it!

I used the construction method that Elizabeth Hartman outlines here on her blog, Oh Fransson!.   I did a couple of things differently though.   I started out with 2.5" squares and sewed them into patchwork panels slightly larger than the pattern pieces.    I then made my quilt sandwich with batting (cut 1/2" smaller) and canvas (cut the pattern size).   I quilted 3/8" apart.   That part was particularly boring.

The only part that I wasn't able to use this on was the Top Panel pieces.   There I cut my batting to size and used the exact QAYG method from the link above.   I started in the middle of the shape (for lack of a better word), and extended it from both sides.   This way I was able to use up some of the weirdly shaped pieces left over from cutting up the fat quarters.

I also changed the handles.   I cut my material at 5" wide instead of what the pattern recommends, and added some length (I forget the exact measurement.   I held it up to my body until it felt right.).   I also used a medium weight interfacing, so the handles seem pretty squishy & sturdy, all at the same time.  

I'm undecided if I want to use purse feet!    I've never used them before and I'm kinda scared to cut holes in the bottom of my bag!   We'll see how brave I get.

I didn't have any trouble finding the zipper at Hobby Lobby.   I decided to go with the 24".   When I was still sewing it all together, I had my zipper come unattached from the other side.   gasp!   Apparently I got one of those zippers that are used for jackets?  I've thrown away the package, so I'm not sure what kind of zipper to never buy again.   Thankfully it was pretty easy to put the zipper back onto the other set of zipper teeth.

If I had to make another Weekender Bag, I think that I would forgo the piping around the main parts of the bag.   That was a lot of trouble to match up when I was sewing my bag together, and it made it terribly obvious when I wasn't exactly on the 1/2" seam.

Also: I forgot to add that my sewing machine just wasn't cutting it for this project!   I could barely fit the bag underneath the sewing foot.   So I took that off.   It still wasn't getting close enough to that 1/2" seam allowance that I needed.   So I took off the part that holds onto the 1/4" foot I usually use.   Basically, all I had was the bar sticking down that attaches to the sewing feet, and a very quickly moving needle.   I'm glad to report there are no bandages on my fingers.

Beth

Fabric Details:  Cherry Limeade Bundle from Pink Castle Fabrics & Essex Linen in Black